What I want to do
Use one of the public labs DIY helium balloons to do mapping of a local invasive aquatic plant Water Chestnut and to help map in downtown Amherst to assist in city planning.
My attempt and results
We've had two attempts so far, the first was a trial run just getting a 'feel' for everything and the second Professor Charlie Schweik and Tony Volpini (a fellow UMass student) went out to Brick Yard Pond in Westfield, MA.
First Attempt: Trial Run
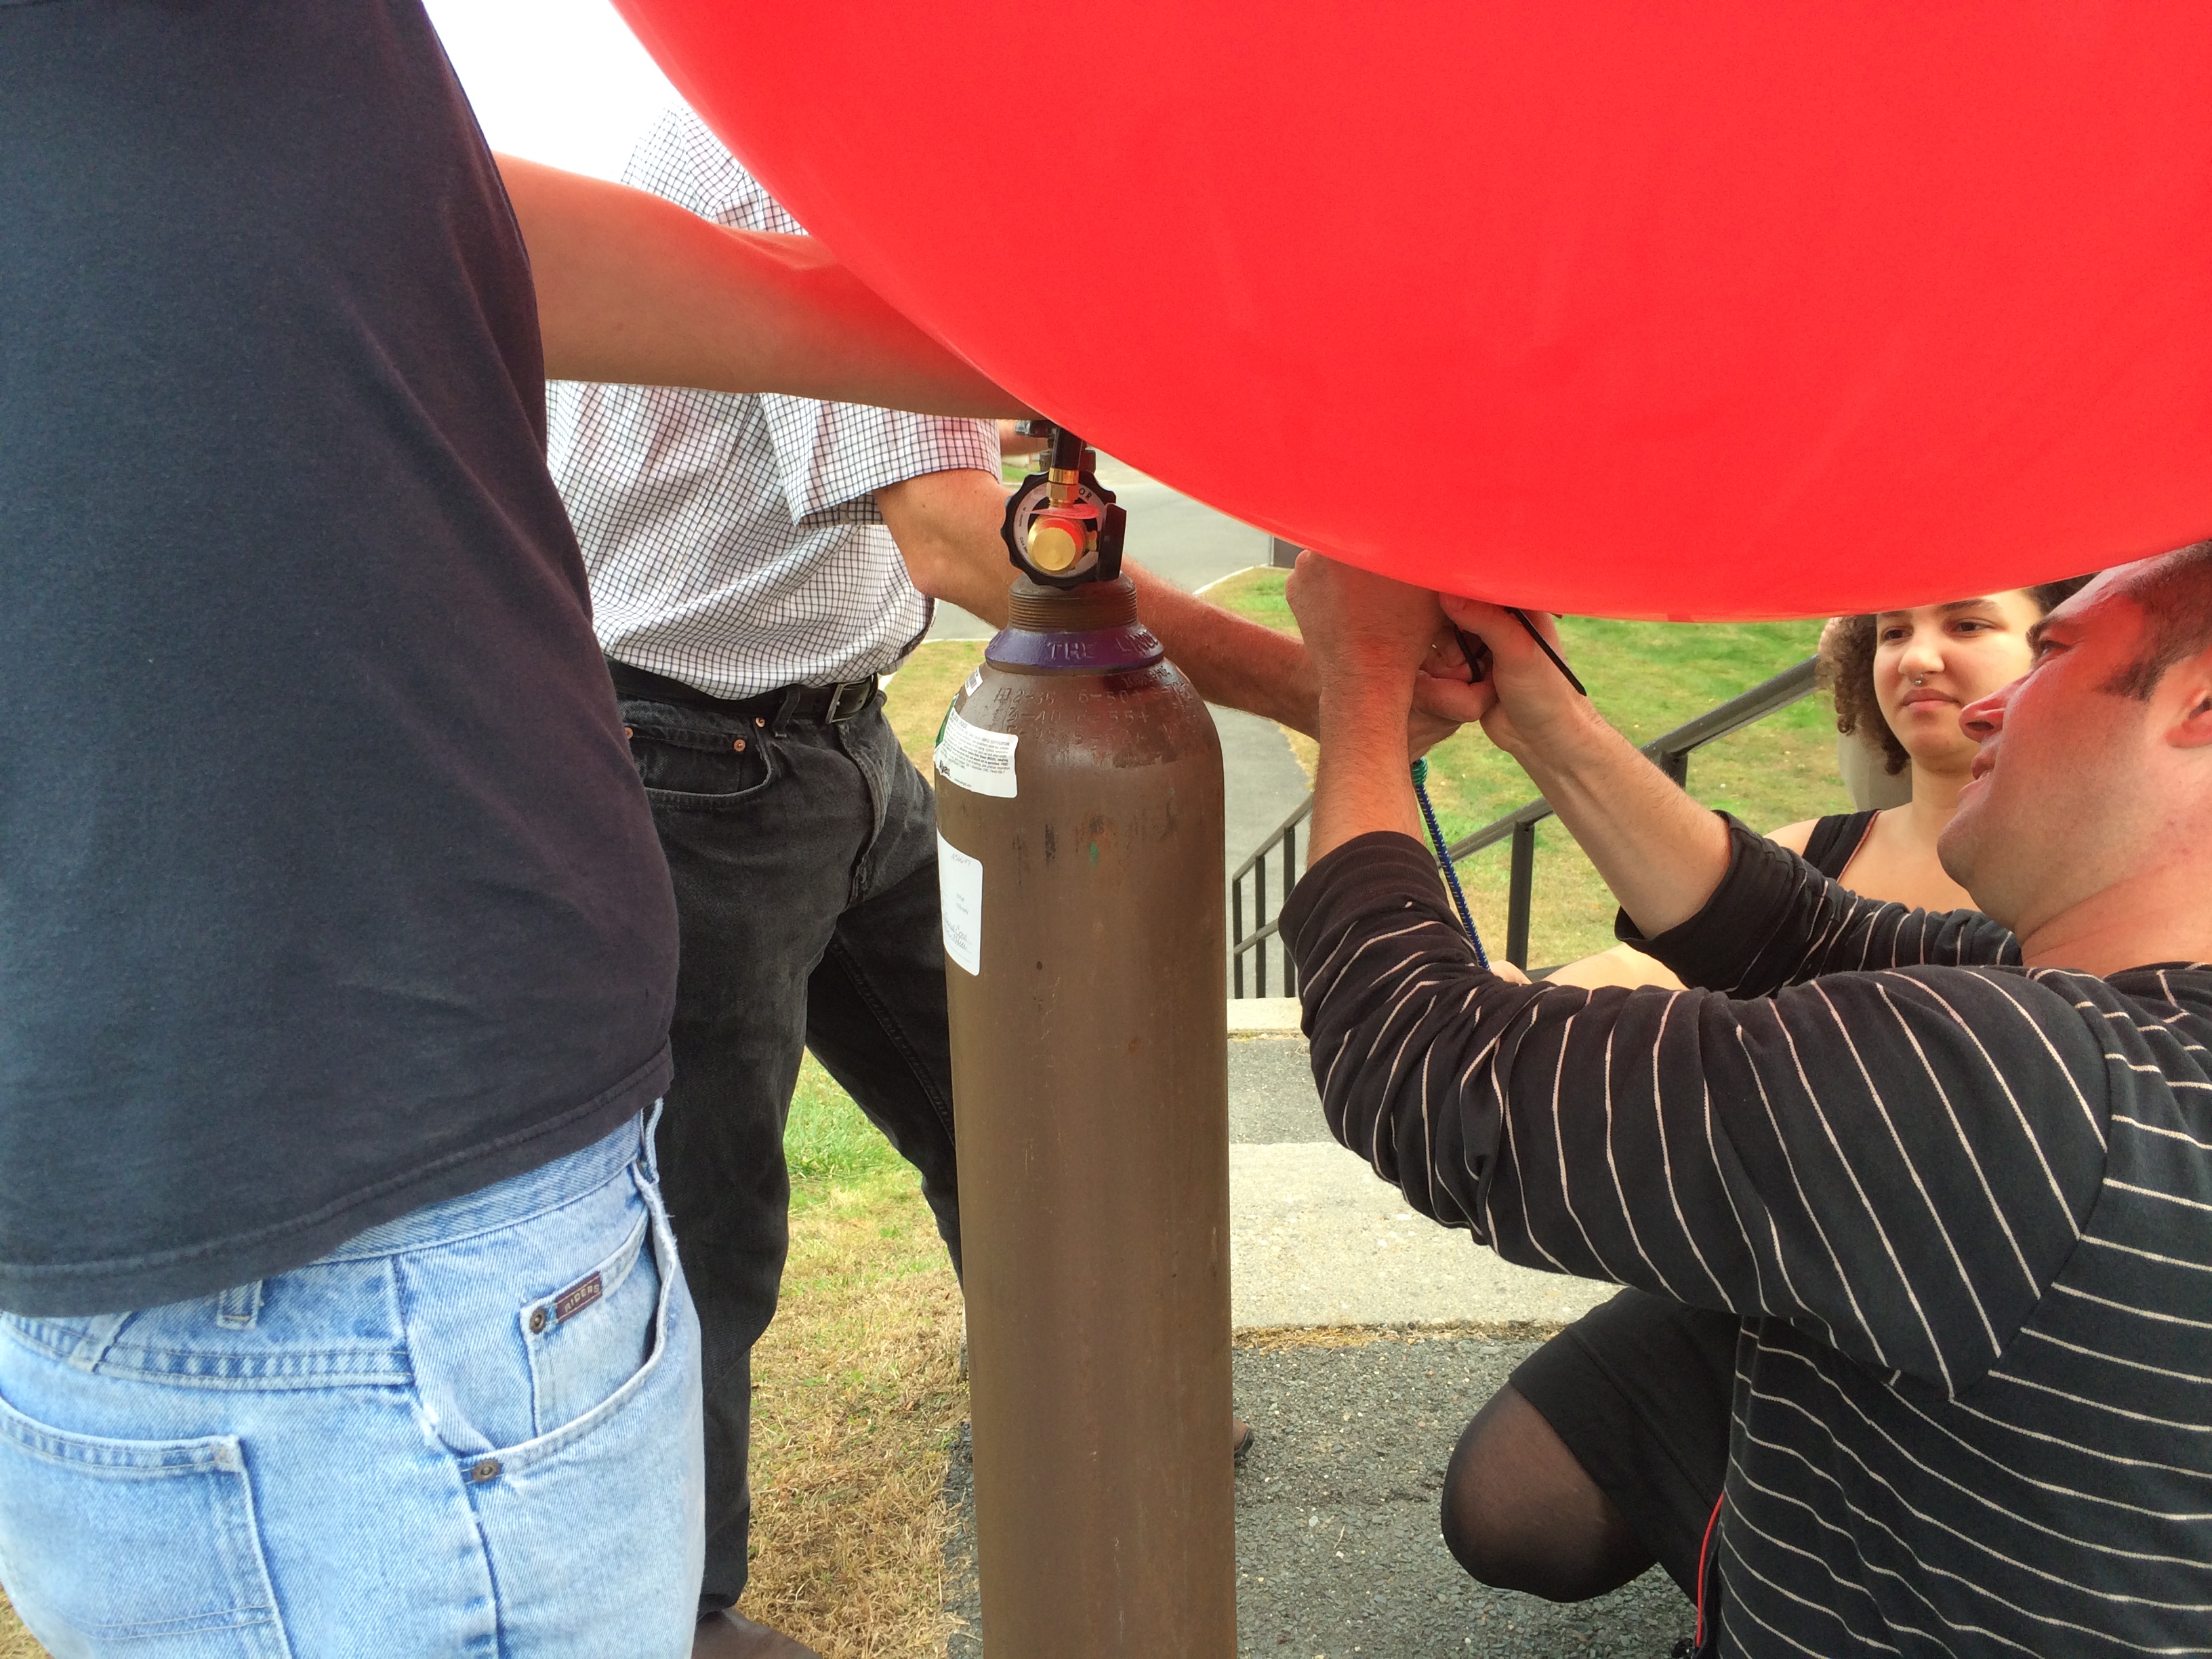
On Wednesday October 15th we had our first 'trial' run with our helium balloon and the DIY mapping! The weather was not exactly ideal but we were all still excited to finally get the balloon in the air [after much complications with actually getting helium to fill it]. A lot of students from the class came out to show support, help and just see this actual contraption go up! We started it out by first filling up the balloon with helium tank [since this was our first time we were unsure of how much helium it would need to lift the camera rig, we ended up having to go back and fill it a bit more after the initial fill up but hey that is all part of the learning process] after we got correct helium to lift the balloon it was time to attach the 3D printed camera rig with cameras [set to take photos every 7 seconds with 4 second intervals] to the balloon. We were a little unsure of how to do this at first and tried to follow what directions we had and ended up attaching in two spots which seemed to work well [most of this can all be seen in the many pictures I've uploaded documenting the steps on the wiki page]. After this we were set for the first trial and lift off of the balloon! And it worked! We we're just outside of Holdsworth on the UMass Campus but we got lift off [considering the weather] for a bit before we decided that maybe it is safer not to fly now and wait until the wind is well a little less windy...But since there was wind and we were already out there we decided to try out the kite. We went down to the fields near the Mullins center [they offered a little more space...and less of an obstacle of items to run into] we used the 9ft kite [the larger of the two] and attached the camera rig in a similar way as we did to balloon and took off. We found that as it was windy it was still a challenge to get the kite up there and did require a lot of space and heavier winds for the weight of the rig. It also may not be as an exact picture for the type of aerial footage we are looking for. But lots of fun to fly and see it all in action none the less.
Aerial Balloon Mapping in Westfield, MA (First Time)
Professor Charlie Schweik and a fellow student of mine working on this project, Tony Volpini went out to Westfield (Brick Yard Ponds) Monday morning (October 20th) to try out the balloon mapping of invasive aquatic plants in the area. They were looking at water chestnut a local invasive here in Massachusetts. The reason why is actually quite interesting, the area used to be a popular fishing pond with the locals but since the invasive water chestnut has taken over it has become hard to fish and even have your boat out in the water during its peak season.The town had asked Karen Leigh who is a conservationist there to help solve this problem. When she learned about the project we were working on we decided to work together using our aerial balloon mapping and her study area to. Professor Schweik and Tony went out there first and they were using the RGB and infra red cameras to try and definitely see plant canopy in the water. We're hoping to use the images taken on Monday and hopefully photo shop out the areas with water chestnut or highlight them and then take these images and put into ArcMap. (pictures from this can also be seen on wiki page)
Aerial Balloon Mapping in Westfield, MA (Second Time)
Professor Charlie Schweik, Tony Volpini, Hannah French and I (Alexandra Ferland) went back out to Brick Yard Ponds in Westfield on Saturday (the 25th) morning. We were hoping to get RGB pictures since we weren't able to the previous time due to user error and/or camera malfunction (still a little unsure why it didn't work). So we hooked up the camera to the camera rig still using just one camera. Due to the amount of helium we have and size of balloon we've been just using one instead of the two cameras on the rig. We had brought a canoe on this trip in order to get out into the middle of the ponds to get a aerial shot of all the ponds to get a better view on the water chestnut. Unfortunately the weather on Saturday was a bit windier than we had hoped for and while we got out in to the canoe with the balloon and camera rig the wind was stronger than we hoped and the balloon dipped are camera into the pond a few times ( Oh no :( it really just does not want us to have the RGB images). But the trip was not all lost...it ended up actually still being very productive. There was a small field on the adjacent side of the pond that where we launched the balloon from with the infrared camera getting it up to 300 ft and got some good shots of the area. We also went out into the canoe and were able to get the exact latitude and longitude of locations where we saw water chestnut. Moving forward we are hoping that the memory card on the RGB camera captured something and hopefully we are able to fix camera.
Georeferencing in ArcMap
Karen Leigh had given us a GIS map of the study area which looked like this:

Professor Schweik and I used this jpeg image in conjuncture with Google maps to preference the image. We used 'add control points' to make six separate points on the image using buildings or roads (something decipherable on both maps) to match them up. After marking six points on the image we opened the 'view link table' in order to input to latitude and longitude (in decimal degrees) that corresponds with each of the points (we used GoogleMaps to get the latitude and longitude). After this we saved and exported map in order to reopen in ArcMap and set it with a spatial reference to WGS 84 (the same that GoogleMaps uses) and to check that our points were accurate I downloaded a road layer from MASSGIS and overlay it onto our image to make sure all the roads lined up with ones on image and they did (YAY). From this we will need to move forward doing the georefrencing but with an image to image georeference using the near infra red and hopefully some RGB).
Flight in downtown Amherst, MA
We recently flew downtown Amherst in an area where there is new construction near Bertuccis restaurant. Professor Charlie Schweik, Michal Lumsden and I flew the balloon in hopes to get an aerial shot of the parcel of land that the new construction is being built on. Since there are no recent photos of the area since 2009 and a lot of construction has occurred since then. However I don't believe we went high enough to get the image we were looking for. We went up about 300 feet before becoming a bit nervous with some upcoming winds and being surrounded by power lines. (P.S we received our new RGB camera and it works great! as you can tell from the images below) Here are a few images from that flights:


Flight at local middle school in Amherst, MA
Professor Schweik and I also did a demonstration at a local middle school here in Amherst, MA for the students who are part of the 'Maker Monday'. We launched our balloon in the back field near the tennis courts and let the kids form a circle under the balloon while it was flying and played a game of whoever was the last one in the frame won. We educated them on the uses for this type of mapping and the implications it could have. They were all very into it and loved the pictures that came out.
Questions
Having two trials has given us a few encounters of some obstacles. * Attachment of camera to rig (Chris Fastie helped to clear this up) -We were attaching the camera rig to kite right away before letting it up and he recommended getting the kite to about 100 feet before attaching camera and to fly kite 10-15 minutes before to check the weather conditions and effects I may have on kite) Correction -How high do we need to fly the balloon to get an entire image of a parcel of land?
- Camera
-The RGB camera when at Westfield has some difficulty and ended up not actually producing any photos
-We got the RGB camera to work however it got wet..find way to hopefully fix by maybe taking out filters and putting into another? Maybe the SD card still captured images? update
- Interpreting photos
-We are just about to be at this step but we need to figure out way to use a program such as photo shop to highlight out the water chestnut from are infrared photos
*Mapknitter
-We were hoping to use the map knitter application on public lab but I have never used before has anyone used this? and think it would be a good way to over lay the near infra-red images over the base map of the ponds from google earth. Would map knitter be a good application for this?
Why I'm interested
I am interested in the aerial mapping because I think it is a great affordable technique that can have many applications in todays world. Within the project we are doing here for the Makers Space class at the University of Massachusetts's Amherst two of the many different applications are being tested. One being using this aerial mapping for invasive specious mapping which is a rapidly growing field of study. Learning how to use affordable techniques can help give the opportunity to many different locations to be able to map and have knowledge of the amount of species in an area over time or just in general. This can help moving forward with management plans to have a growing knowledge of how large or small the issue may be. The second application we are using the aerial mapping for is city planning. The use of the helium balloon is also an affordable way for a town to get photographs for anything they could need. In our case it is an area that could possibly be suitable for a parking lot for a new apartment complex that is being built downtown. With the town using aerial photography from the balloon they are saving lots of money in comparison that they can now use in other areas.
Mapknitter
Tony Volpini who I worked on this project with used map knitter offered through public lab to try and get some of our images overlay on a Google earth screen shot we had of the area. This is Tony's account of his experience with map knitter and final conclusions to the project. After using the remote imaging portion of the project we moved onto the image analysis. To convert the IR photos into a usable ArcGIS layer we used the Public Labs Mapknitter application. Unfotunately the few color images we had were not usable. First we went through the IR photos to choose which were useful. Then each photo was imported to Mapknitter, and manipulated (Scaled, stretched, rotated) to match up with an underlying Google maps image of the Westfield area. After all the photos were correctly aligned Mapknitter processed them into a single GeoTIFF file for ArcGIS use. The actual analysis to determine where Water Chestnut was, happened in Photoshop. We then took the composite image created by Mapknitter and overlaid the GPS locations taken while canoeing around Westfield. This identified where known water chestnut plants were. In Photoshop the locations then were analyzed by color to look for any differences between water chestnut, and native plant species.
Unfortunately, our approach was not entirely successful. Due to a lack of data, we were unable to reach significant conclusions. Our efforts produced a limited number of low resolution photos, in which we could not detect water chestnut. Because the two cameras were the same model, it is unlikely that the colored images could have resolved this issue. Higher resolution photography would allow for better color analysis, as well as texture analysis. In addition, we recommend taking photographs earlier in the season when water chestnut is at its peak, covering a larger portion of the proposed land area, and including GPS waypoints within the water bodies to aid in Georeferencing. Despite multiple setbacks and inconclusive results, our project remained a rewarding exercise in remote imaging, GIS techniques, and map analysis.
Final notes on the semester
Unfortunately the semester has to come to end which means that this project for now has come to an end. Moving forward next semester if someone wanted to continue to work on this project I think that it is completely plausible. They could continue in what Tony, Hannah and I left off with and go back out to Westfield earlier in season to get photos of the ponds completely covered and with an RGB camera and then pretty much do what we did to analyze with map overlaying and possible the photo shopping steps but with more waters chestnut visible. Or the students could go into a whole other direction in regards to the policy surrounding the devices that are airborne and take pictures or videos like a quad copter. It would also be interesting idea to use both devices and compare the images both are able to take since one (the balloon) is obliviously substantially cheaper. But in regards to the project I worked on I thought the Makers Class was awesome. I learned a lot about all this DIY projects through hands on experience with trial and error. This idea of a 'maker' was all completely new to me without any prior knowledge of this type of area I would love to continue working in this area even as just as a hobby. I think it's a great way to get experience in a fun and educational way.
8 Comments
Fantastic documentation! Love the project goals. Keep us posted!
Reply to this comment...
Log in to comment
Ally, It is the kite that should be flying at least 100 feet high before you attach the camera rig to the line. The camera can be attached to the line directly below a balloon, although it can help to send the balloon up first without camera to be sure there is not too much wind up there. It's always important to fly the kite for a while before attaching the camera to determine if the wind is suitable.
Have you figured out why the RGB camera did not record photos?
Chris
Is this a question? Click here to post it to the Questions page.
Reply to this comment...
Log in to comment
Chris we figured out why it wasn't taking pictures but then when we were out trying to fly balloon we thought going into canoe would be a good idea. However, it was bit to windy and the RGB camera took a few dips into the pond and is out of commission currently.
Reply to this comment...
Log in to comment
Yikes, that's not good. Let me know if you need help getting a replacement camera. There are several on ebay now and I think I have another one here.
Is this a question? Click here to post it to the Questions page.
Reply to this comment...
Log in to comment
Ally and @cschweik,
That's great new stuff on the wiki page. Nice photos of water chestnut. Were you able to get the RGB camera working?
I have a question about a photo on the wiki of the single camera on the Titan 2 Rig. The camera wrist strap is tied to the white tubing to keep it level. Just to be sure, does that mean that you have been flying the Titan 2 Rig with the camera tray loose in the upper frame? The standard procedure is to tighten the wing nuts so the camera tray is locked in position. The Picavet suspension is designed to keep the entire rig level, and the cameras will be more steady if everything below the Picavet lines is rigid.
I will have to send you a single camera tray that fits your upper frame so you can use the rig for either one or two cameras.
Also, when you fly just one camera, you don't need the timer and batteries to trigger the camera shutter. There is a script installed on the SD card that will trigger the shutter at any interval. I think it is called "interval.bas." Let me know if you need help getting that working.
Chris
Is this a question? Click here to post it to the Questions page.
Reply to this comment...
Log in to comment
Hi Chris. Thanks for your continued interest in our project. We've got some ideas on trying to use photoshop to extract out water chestnut. We'll see how it works. We'll do that after we georeference one of the NIR images we have.
Yes, the RGB camera is shot. We've learned a lesson there. It was pretty calm when we first went out in the canoe and we wanted to do that to get away from the trees, like we did in Lake Warner last year. But just when the students were out in the middle and starting to deploy a big burst of wind came and pushed the balloon down and the rig dipped into the water 3 times. I tried drying out the camera but it appears shot.
We have been asked to do a flight for the town of Amherst so I would like to get another camera that works with the titan rig. If I buy one on Ebay, how hard is it to load your script for the timer?
Also, we tried flying the full rig but maybe we didn't put enough helium in. We had a hard time getting it to lift it, which is why we turned to one camera lifts. I have a hard time knowing when it is time to stop filling the balloon. I worry about popping. I think the Public Lab balloon kits should include an extra balloon to help avoid that stress.
Thanks for your ongoing interest in our projects.
Cheers Charlie
Is this a question? Click here to post it to the Questions page.
Reply to this comment...
Log in to comment
Lifting two cameras with a Public Lab balloon requires that you fill the balloon to just about its capacity. I think it should be 5.5 feet in diameter when full, so you just need to figure out some way to measure that. We had the balloon pretty full at Warner Lake last year. When it is that full, only a few to several flights are possible before it becomes likely that the balloon will pop during the next filling. So really the balloon kit should include an endless supply of new balloons!
When flying a single camera, a much lighter rig is possible and no electronics are required. I just redesigned the Titan 2 Rig so the upper frame fits the single camera trays of the Redstone Rig, and I am going to start including a single camera tray with each Titan Rig.
If you buy another A590, it will work with the SD card you have only if you happen to get one with the exact same firmware version (there is really no way to know in advance). But it is not that hard to start fresh and prepare an SD card for any new camera. Get the program STICK and follow the instructions. However, you will then have to configure CHDK for remote synchronous operation. That is easy too, but only after you figure out how to do it.
I have an A590 here that I can sell (I will replace it on ebay at my leisure), and I can install CHDK and configure it. I can also print a single camera tray that will fit your upper frame (no extra charge) and drill it for the A590 tripod socket. If I mail it on Thursday you should get it Friday or Saturday (or sooner if you need it).
Chris
Reply to this comment...
Log in to comment
Ok, email me on the price -- I think I will purchase through you (thanks for the single camera tray). Should I pay through your website?
Is this a question? Click here to post it to the Questions page.
Reply to this comment...
Log in to comment
Login to comment.