Video Spectrometer Construction
This page documents the construction of the video spectrometer, which is no longer actively supported. Please see one of the following newer designs:
- Foldable Mini-spectrometer - small paper model which attaches to a smartphone
- Desktop Spectrometry Kit - similar, but built in a conduit box
- Smartphone Spectrometer - high-precision rigid plastic version which attaches to a smartphone


Also consider purchasing a Public Lab kit from our store:
These instructions are no longer up to date. Please read above.
For usage, see video spectrometer usage. For drafts and older instructions, see video spectrometer construction drafts.
If you have trouble, see Video Spectrometer Troubleshooting
Quick-start video
This 10 minute video walks through a simplified but effective version of the video spectrometer. It skips the step of removing the infrared filter, but can be modified later for infrared data:
Full step-by-step instructions
Construction using these steps should take less than 1 hour. Open-source software to operate this spectrometer is available at: https://spectralworkbench.org
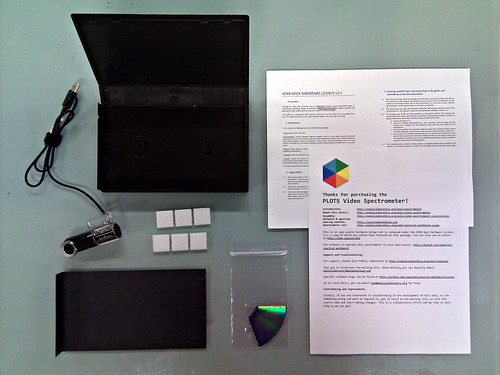
Materials
Everything necessary to make a DIY spectrometer:
- a black VHS case like from Blockbuster - $0.50
- scissors
- X-acto knife
- duct tape and/or hot glue
- approx. 4 in x 8 in stiff black card paper - $0.50
- a DVD-R - $0.50
- a USB webcam, preferably HD resolution (like this one for $25 or this one for $8)
- a computer with a web connection
Construction
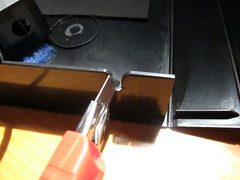
1. Cut off the VHS nubs
The flatter the better. Some cases have nubs on the top; it's still not a bad idea to remove them as they can create reflections in the case.
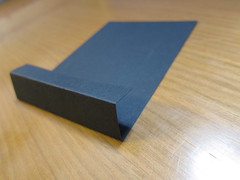
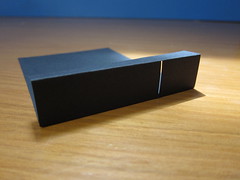
Get out your black card and straighten it if it's become crooked. The kits ship with a pre-folded card as shown.
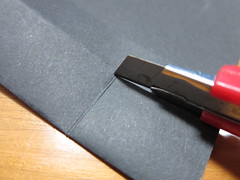
2. 3 cm from the edge, carefully cut out a <1 mm wide strip where shown
This is one of the most important steps; the slit should be very consistently straight, and quite narrow. Light will pass through here to enter the spectrometer. Generally, the narrower the slit the higher resolution the device, but then less light can enter, so you won't get as strong of a reading.

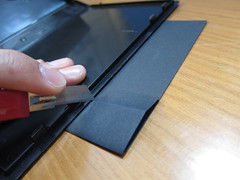
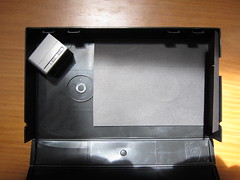
3. Put the card in the box, and cut a larger opening in the VHS case to expose the slit
The opening can be a centimeter wide; the black paper just lets you make a more precise slit than you'd get when cutting the box. You can also replace the slit to make it more precise or if it gets damaged.

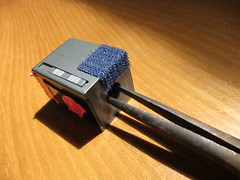
4. Snap off the useless half of the webcam
Some cameras may sit flat on the bottom of the box; our kit includes a nice, compact camera with flat sides (hard to find! too much ergonomics!) but you can make it even smaller by snapping it in half.
If you can't find a flat-bottomed camera, you can use hot glue, epoxy, moldable plastic, or metal brackets to ensure that your camera stays level and rigidly in place.
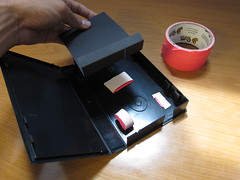
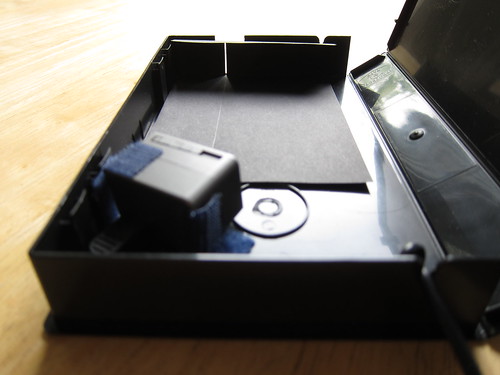
5. Check that your camera will align with the slit, and attach the black card
An imaginary line directly from the slit should intersect the lens. You may have to adjust the angle of the webcam later, once you start collecting spectra. Tape or glue your black card in place, firmly abutting the wall with the opening. You may have to add black tape (gaffe tape works well) to absorb reflections if your box is very shiny or has light leaks.
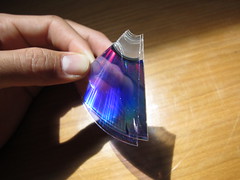
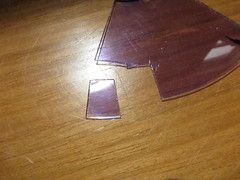
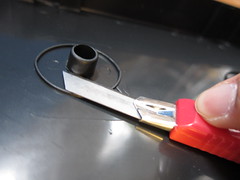
6. Split the DVD-R into layers and cut a small rectangle from the clear layer
Don't get fingerprints on the DVD, and cut your "grating" from the outside edge where the track lines are more parallel. You can cut this piece down more precisely later.

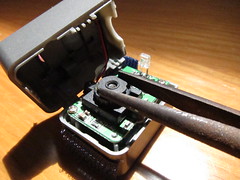
7. Apply gentle pressure with pliers to open the webcam, and cut the DVD to fit inside the lens hole
You'll have enough DVD to try again if this goes wrong. Align the outside edge of the DVD so the track lines will appear vertical in the resulting video.
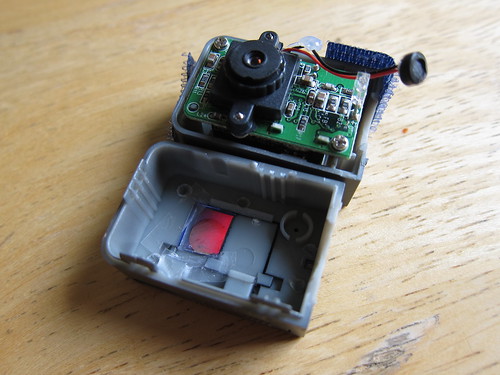
8. Tape or glue the DVD piece in place
Superglue may leave a "frosty" looking stain, so try hot glue or epoxy. Tape works fine -- just don't cover where the camera will look through.
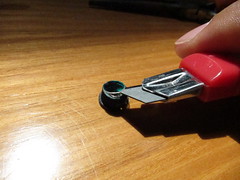
9. Unscrew the lens and remove the infrared filter
Heating the lens a bit with a hair dryer can help loosen it. The filter will look iridescent -- you can throw it away. Screw the lens back in close to how it was.
More tips on removing filters from other types of webcams can be found here: Webcam filter removal
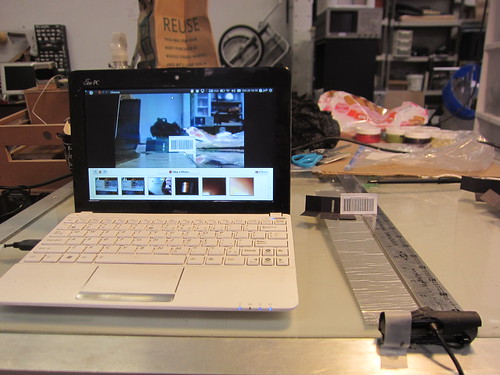
10. Look at a barcode through the webcam to refocus it to about 20 cm (8") away
Use a webcam program like Photo Booth or even https://spectralworkbench.org/capture (experimental). A barcode has fine details so it's a nice test of focus. (The above image is of an older kit)
Rotate the camera lens to adjust the focus. You may need to gently use a pair of needle-nosed pliers at first. Anything around 8 inches away from the lens should be in focus. This means your slit will be in focus when the box is closed. If you don't carefully refocus your camera, your spectra will be of very low resolution.
Now snap your webcam back together.
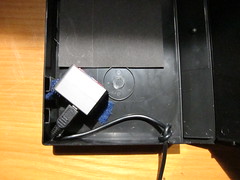
11. Cut a notch for the USB cable, and fix your camera inside the box
Leave a couple inches of cable slack in the box. A knot inside the notch assures that the camera is not disturbed even if you yank the cable a bit.
You can use Velcro to allow for re-adjusting the camera angle; it'll be about 45 degrees and you can glue it in place once you've gotten it right.
12. Close off any light leaks with dark tape
Shiny sides inside the box may create reflections, and light may leak in where the hinge meets the corner of the box. Dark gaffe tape can help, as can more pieces of black paper. Some people line their boxes with felt or black velvet (fancy!).
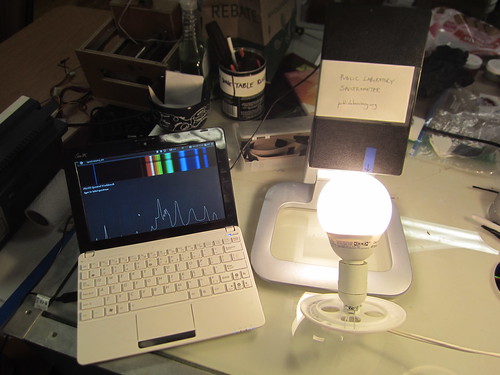
A completed spectrometer
I added a blue tape with an arrow so you know where the slot is, and mounted it on an old LCD monitor stand. Pro-fessional!
Using your spectrometer
The PLOTS Spectral Workbench software is still in beta, but you should be able to get started collecting spectra. A video on how to use the spectrometer is on the front page:
Getting involved
The design is still being modified and improved. If you have ideas for how to make it better, chip in on the mailing list by joining Public Lab: http://publiclaboratory.org/join